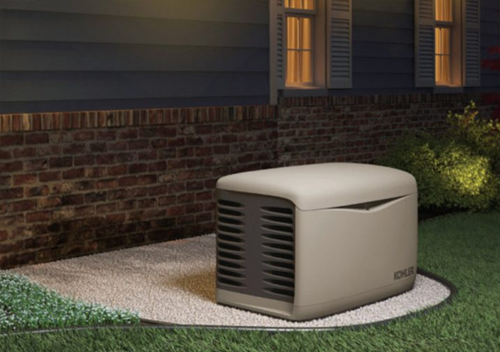
Generators are essential for providing backup power during outages, but like any machinery, they can encounter electrical problems that may hinder their performance. Identifying these issues early can save you from costly repairs and prevent frustrating downtime. In this guide, we’ll provide a comprehensive checklist to help you recognize and troubleshoot common electrical problems in your generator, ensuring you’re prepared when you need it most.
1. Signs of Electrical Problems
Before diving into troubleshooting, it’s essential to recognize the signs of electrical issues with your generator. Common indicators include:
- Generator Won’t Start or Cranks Slowly: If the generator fails to start or cranks with difficulty, it may point to battery or electrical issues.
- Inconsistent Power Supply: Flickering lights or appliances shutting off unexpectedly can signal voltage irregularities.
- Burning Smell or Strange Noises: Unusual odors or sounds—such as popping, hissing, or grinding—could indicate short circuits or failing components.
- Circuit Breaker Tripping: If the generator’s circuit breaker frequently trips, this may suggest an overload or internal fault.
2. Preliminary Checks
Conduct these basic checks before diving deeper into troubleshooting:
Check the Power Source
- Fuel Levels: Ensure the generator has sufficient fuel. If you’re using diesel or gasoline, stale fuel can also affect performance.
- Oil Levels: Low oil levels can lead to generator shut-downs. Verify oil levels and top off if necessary.
Inspect the Battery
- Connections: Inspect battery terminals for looseness, corrosion, or damage. Clean any corrosion with a mixture of baking soda and water, and tighten connections.
- Voltage: Use a multimeter to check the battery voltage. A healthy battery should read around 12.6 volts or higher. If it reads less, consider recharging or replacing the battery.
3. Diagnostic Checklist for Electrical Problems
After the preliminary checks, use this detailed checklist to identify specific electrical issues:
Step 1: Examine the Control Panel
- Indicators: Check the control panel for warning lights or error codes that may indicate malfunction.
- Fuses and Breakers: Inspect fuses for any signs of blowing; replace any fuses that appear burnt. Additionally, ensure the circuit breaker has not tripped.
Step 2: Check Wiring and Connectors
- Visual Inspection: Look for frayed or damaged wiring and faulty connections. Pay special attention to areas that may be exposed to friction or heat.
- Secure Connections: Ensure all connectors are tightly secured, as loose connections can lead to arcing and overheating.
Step 3: Test the Voltage Output
- Voltage Meter Test: Using a multimeter, measure the voltage output at the generator terminals. Compare the readings with the generator specifications. For most generators, output should be around 120/240 volts.
- Inconsistent Readings: If the voltage readings are significantly lower or higher than the specified range, it may indicate issues with the voltage regulator or alternator.
Step 4: Inspect the Alternator
- Physical Inspection: Examine the alternator for any visible damage or wear, including the windings and bearings.
- Brushes: Check carbon brushes and the commutator (for brush-type alternators) for wear. Replace them if they appear worn or damaged.
Step 5: Check the Fuel System (if applicable)
- Fuel Lines: Inspect fuel lines for leaks or blockages. A clogged line can prevent fuel from reaching the engine properly.
- Carburetor: If your generator has a carburetor, inspect it for dirt or debris that may hinder performance. Cleaning the carburetor can often resolve fuel delivery issues.
4. When to Call a Professional
Some electrical problems may be too complex or dangerous to attempt fixing without expert knowledge. Consider contacting a professional if you encounter the following:
- You cannot resolve the issue after running through the diagnostic checklist.
- You detect burning smells, smoke, or signs of fire.
- The generator shows severe signs of wear and damage beyond your expertise.
Conclusion: Stay Ahead of Electrical Issues
By recognizing the signs of electrical problems and using this diagnostic checklist, you can proactively manage your generator’s health and ensure reliable backup power whenever you need it. Regular inspections and timely troubleshooting can help extend your generator’s lifespan and maintain optimal performance.
Have you faced electrical issues with your generator? What solutions worked for you? Share your experiences in the comments below! Don’t forget to share this informative guide with fellow generator owners who might benefit from it!
continue reading
Related Posts
In our increasingly power-dependent world, generators play a crucial role […]
Generators are invaluable assets, providing much-needed power during outages and […]
Power outages can happen anytime, and their impact can range […]


